|
|
||
|
|


 |
|||||||
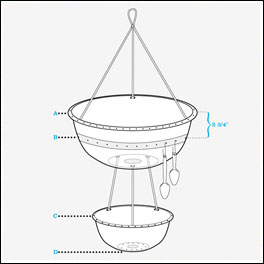
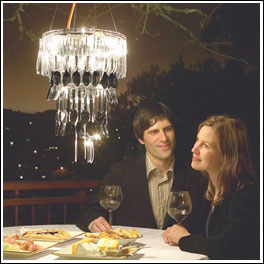 Take Out Chandelier
Choose one—Dangling crystal pendants are: a) too grown-up, b) too gala event, c) too expensive, or d) all of the above. You know the answer. This version, constructed from the plastic utensils you've been keeping around in case a picnic for forty crops up, makes the same grand statement without being precious. It's a nod to formality, but with a contemporary twist. What else would you do with the disposable flatware that every takeout order oversupplies? Plus, it's outdoor friendly—ideal for dressing up your porch light and keeping moths at bay with its armor of serrated knives. Ingredients
Tools:
Instructions
|